Intel® XDK Overview
Lesson 1: Get Started
Summary
In this article we want to cover how to make a mobile application using App Starter and App Framework within the Intel XDK. App Starter is great for multi-page simple applications that have a few pages of content and a footer at the bottom to quickly navigate between the pages. If you haven’t already downloaded the Intel XDK, go ahead and do so here. The idea behind this tutorial is to show how a beginner can make an application using the Intel XDK even if they are not familiar with HTML, CSS, or JavaScript. We’ll make a very simple application that provides a landing page, about page, a list of content, and a resources page. If you are more familiar with these technologies, we suggest you try App Designer as your layout tool which is documented here. Let’s start.
Decide on an App Idea
When thinking of an idea for an application, try to think of an application that solves a problem. For this tutorial, our problem is that we have a yoga routine we can't remember when we travel so we want an app that walks us through our routine. When you are learning to write apps, look through the app stores and try to emulate simpler versions of some common applications: a calculator, a simple game, a todo list, etc.
Create a Project
Open up the XDK and select ’Start a New Project’ in the bottom left-hand side of the screen.

Under the ‘START NEW APP’ options in the left pane, select ‘Use App Starter’.

In the right pane we will name the project ‘YogaAppStaterApp’ and select a project location, in this case a folder with the same name on our desktop.

Click the ‘CREATE’ button in the bottom right corner of the screen.

If this is your first time using the Intel XDK, you may see the following prompt:
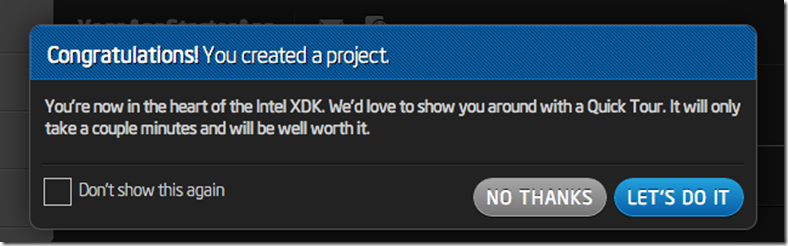
Feel free to take the Quick Tour or select ‘Don’t show this again’ to prevent this dialog from appearing again. TIP: Note that once you select ‘Don’t show this again’ you will not be able to get back to the Quick Tour later. For now we will click ‘No Thanks’.
Use the Develop Tab
Click on the ‘Develop’ tab at the top, if you are not there already.
You should see a blank screen with the following navigation pane on the left.

Double-click on ‘index.html’.
TIP: If you single click the file will load, but double clicking a file adds it to your ‘Working Files’ and makes it easier to come back to later.
You should see two buttons at the top of the screen for CODE and DESIGN:

These buttons will let you switch between the code editor and the App Starter. Make sure the ‘DESIGN’ button is selected, and you should see a pane like this:

You can toggle back and forth between 'CODE' to view and edit code in the Adobe Brackets* editor, and 'DESIGN' to work with App Starter to drag and drop elements in a GUI (graphical user interface). For this project we will use App Starter in the 'DESIGN' view, but feel free to use the 'CODE' view to look at the HTML and CSS generated as you drag and drop elements into your application.
Lesson 2: Design
Design the App Layout
Typically a developer will get initial input from a designer on the layout of the application or storyboard. The most common deliverable from a designer is a wireframe. For this project, I have provided the following wireframe which we will use to guide our application layout. This wireframe or mock-up was created using Balsamiq*’s Web App and can be foundhere.
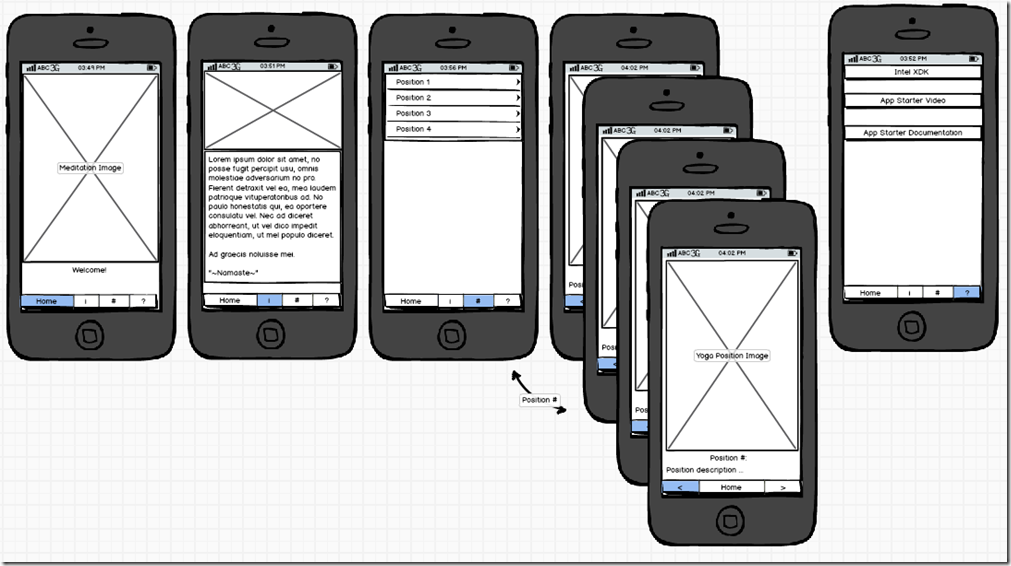
Click to enlarge the image above in a new tab.
Usually a wireframe like the one above is enough for a developer to get to work. Many developers will use temporary or placeholder images while a designer or artist creates final images or ‘assets’ to make the application look professional. We are going to need some placeholder images from the web. You don’t need to have an art degree to create a good looking application, there are several websites where you can collaborate with designers or public domain artwork libraries on the web.
TIP: It is a good idea to check all licensing on image files and make sure that any images you get from the web are license under the CC0 or ‘No Copyright Creative Commons’ license which states:
"The person who associated a work with this deed has dedicated the work to the public domain by waiving all of his or her rights to the work worldwide under copyright law, including all related and neighboring rights, to the extent allowed by law.
You can copy, modify, distribute and perform the work, even for commercial purposes, all without asking permission."
Get Project Files
Today, we’re going to grab our images off of Pixabay* that generally serves up CC0 images. Remember to ALWAYS check your license files on images you use. Even sites like Pixabay* often have featured or advertised content that is not CC0 licensed.
For this lab, I searched for keywords ‘meditation’ and ‘yoga’ and downloaded the following SVG images:
For your convenience, we've provided a zip file containing all the images. Click on the 'Download' button below:
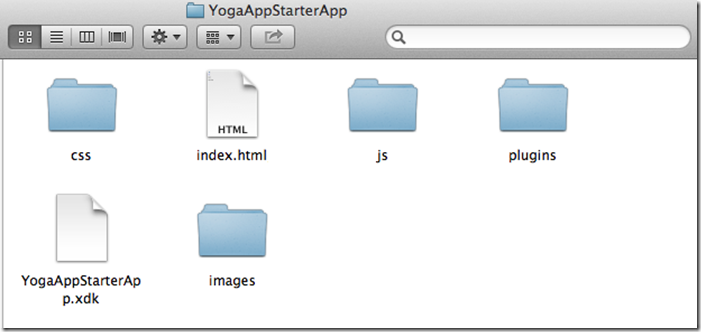
Unzip the images, navigate to your desktop (or alternate path if you browsed to a different project location) to find the app folder, and place them in the YogaAppStarterApp folder as shown below.
TIP: The reason we used SVG images which have the file extension ‘.svg’ is because Scalable Vector Graphics are just that, scalable, and can resize without distorting the image. They are usually relatively small and good for line-art or clipart like we are using here. It also prevents us from having to have very large images that will bloat the memory of our application or very small images that get distorted on a larger screen.
Add Files to the Project
Once you have the images in the correct folder, return to the Intel XDK and right-click on the file list to the left.
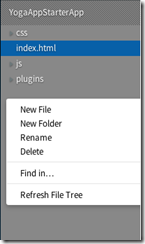
Select ‘Refresh File Tree’ to see your new files. You should see an ‘images’ folder appear and it will take a few seconds to load all your files. The panel will turn a darker grey while the images load.
If you click on the the arrow to the left of the ‘images’ folder you will see your five files have loaded.


Now lets learn how to use these images!
Remove 'Hello World' Button
Every app has a page the user of an application sees first. We often call this the ‘home’, ‘main’ or ‘landing’ page. Sometimes you will hear the phrase ‘splash screen’ if the first page is only visible for a few seconds while the application loads. For our main page we are going to add an image and some welcome text.
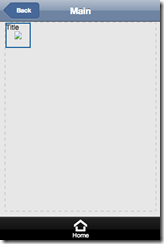
In the App Starter, the first page has been created for us with a button for ‘Hello World’, which we don’t need, so we are going to delete it.
Click on the ‘Hello World’ button shown in the center of the screen.
You should see the ‘Page Properties’ turned into ‘Button Properties’ on the right-hand side of the screen.
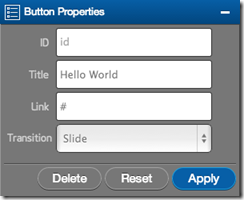
Click on the ‘Delete’ button to delete the 'Hello World' button in the application. A dialog box will appear…

Click the blue button for ‘CONFIRM’ to delete the button and you will see the button disappear.
Lesson 3: Create Home Page
Add a Layout Element
Next we are going to add a layout.
Click the ‘Elements’ tab in the left toolbar to display some layout elements.

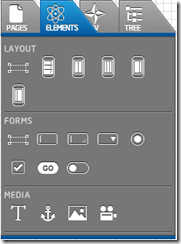
Drag and drop the first 'Container' element under 'Layout' onto your application canvas in the center of the screen.


You’ll notice the ‘Container Styles’ on the right has the width of 100%. We are going to add a height of 100% also so that our main page stretches to fill any screen size.

Type ‘height:100%;’ into the ‘Container Styles’ box and click the blue ‘Apply’ button to see your Container layout change size.
TIP: Any time you are writing styles be sure to add a semi-colon to the end of each style ‘;’ so that the browser knows to check the next line for more styles.
Add an Image Element
Next we are going to add an ‘Image’ to the ‘Container’.
Drag the landscape icon or 'Image' element into the 'Container' or blue box in the center of the main application page.

In the right-hand ‘Image Properties’ pane set the following properties:
Title: Meditation Monk
Source: images/enlightenment-154910.svg
Width: 100%
Height: auto

If you hover your mouse over the image without clicking on anything you will see the title 'Meditation Monk' appear by your cursor.
TIP: The source tells the browser which image to load, in this case, the image of the monk from your ‘images’ folder. You always need to include the path from where your styles are, in this case the .html file which is in the root or top level folder. So to get to our images we need to look inside the images folder and need to prefix all file names with ‘images/’.
Apply Styles to an Image
We set the width to be 100% of the screen width, and using ‘auto’ for height will ensure our image scales proportionally to the width and doesn’t stretch.
Click the blue ‘Apply’ button to see your image magically appear and resize to 100% of the application width.

Ommmmmmmm…
Behold! We have a meditating monk! Lets add a greeting.
Add a Text Element
In the ‘Elements’ tab and under the 'MEDIA' section, select the ‘Text’ element and drag it under the monk image.

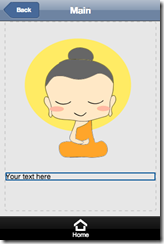
In the right-hand pane, change ‘Your text here’ to ‘Welcome!’. You’ll notice it is a bit off center. Lets center it!
In the ‘Text Styles’ pane to the bottom-right we are going to center the text by typing:
text-align: center;

Click the blue ‘Apply’ button to see the text center.
Set the Page Header
Before we move on we are going to set the page header so we don’t have to come back to it later.
Click on the left pane ‘Pages’ tab and select your ‘Main’ page so the ‘Page Properties’ appears in the top right pane.


Change the ‘Header’ to from 'default' to ‘header_0’ and click the blue ‘Apply’ button.

‘header_0’ is just the name of the another header (we can change the name later if we want) other than the default. ‘default’ only has a ‘Home’ button and eventually we will want more navigation buttons to connect our new pages to. We will need to do this to every new page we create.
That’s it for the main page!
Lesson 4: Create About Page
Create a New Page
Next we are going use what you just learned to make an About page.
Click from the toolbar show in the left-hand side of the Intel XDK to add a new page. You should see a ‘New Page’ created.


Click on ‘New Page’ to see the ‘Page Properties’ appear in the top right panel.
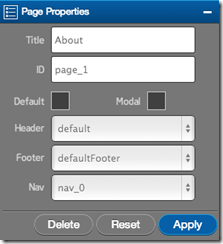
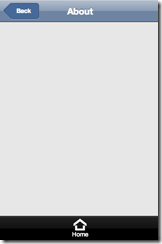
We are going to set the ‘Title’ to ‘About’ and click the blue ‘Apply’ button. You’ll see the title changed at the top of your application.
Add Content
Lets see what you can do on your own. Refer to the previous section if you get stuck:
Add a Container with 100% width and height.
Add another image of the monk with height of 40% and width set to 100%.
Add a ‘Text’ element with the following text:
Yoga is very healthy for you. You should try to do yoga every day. Try to focus on your breathing and with each movement breath in, and then breath out with the next movement. Try to breath down into your belly. Take it slow and never force your body. Let the energy flow through the top of your head to your feet grounded on the yoga mat. If you do yoga every day, you will be more flexible and live a long and fulfilling life. ~Namaste ~
At this point you should have something that looks like the following:

Add a Break Tag
Lets add the break tag “<br>” before “~Namaste~” to put it on a new line. Hit the blue ‘Apply’ button.

You can even add a second <br> to push it down the page.

For extra credit, you can center the text.
And last but not least, set your header to header_0 for the ‘About’ page.
Good job! Your second page is done!
Lesson 5: Create List Page
Create a List
Go back to the ‘Pages’ tab and add a new page with the title ‘Series’.
Go to the ‘Elements’ tab and drag a ‘List’ layout element onto the page.

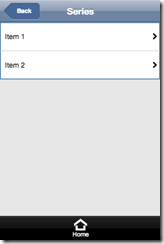
We are going to have four yoga positions so click the plus sign in the ‘List Properties’ view twice.

You should see two more 'Item' entries appear.
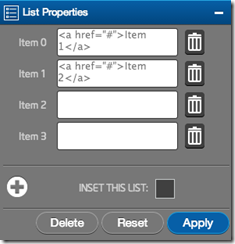
Rename the List Items
Instead of ‘Items’ we will have ‘Positions’ so we need to rename what the user sees in the list. First copy the text inside ‘Item 1’ into ‘Item 2’ and ‘Item 3’.

Then replace all mentions of the word “Item #” with “Position #” substituting # for a number and click the blue ‘Apply’ button.

Make sure your positions list counts from 1 to 4.
We now have our positions list to start from. We will need a separate page for each position. You should already know how to create a new page…
Lesson 6: Create Content Pages
Create Multiple Pages
Click on the Pages tab and add four new pages. You should have a pane that looks like the following:
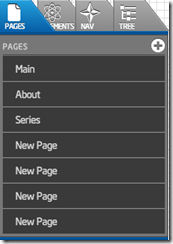
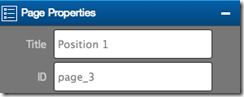
Now select each page in the ‘Pages’ pane and in the ‘Page Properties’ on the right re-name each page 'Title' to “Position1”, “Position 2”, “Position 3”, and “Position 4” respectively. Remember to hit the blue ‘Apply’ button to save the ‘Title’ change.
Your right pane should look like the following:

Time to test what you remember. Refer to the previous sections if you get stuck.
We are going to repeat the previous section of instructions but we are going to use different images on each page and use the text field to describe each image.
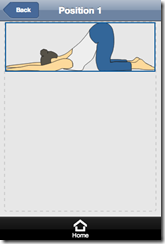
Add Position 1 Image
Click on ‘Position 1’ in the ‘Pages’ pane.
Now in the ‘Elements’ tab we are going to add a 'Container’ element from the ‘Layout’ options and set the width and height to 100%;
Next add an ‘Image’ element and in the ‘Image Properties’ pane we will set the following:
Title: Child’s Pose
Source: images/figure-37268.svg
Width: 100%
Height: auto

Now drag a ‘Text’ element onto the page and change the text to the following:
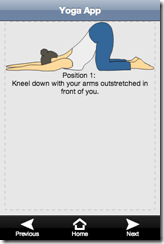
Add Position 1 Text
Position 1: <br>Kneel down with your arms outstretched in front of you.
In the ‘Text Styles’ pane set the text to be centered and ‘Apply’ your changes.
Position 1 page should look like the following:

Set the header to ‘header_0’.
Click save .

On to the next page…
Add Position 2 Image
Click on ‘Position 2’ in the ‘Pages’ pane.
Now in the ‘Elements’ tab we are going to add a 'Container’ element from the ‘Layout’ options and set the width and height to 100%;
Next add an ‘Image’ element and in the ‘Image Properties’ pane we will set the following:
Title: Bridge Pose
Source: images/man-37262.svg.svg
Width: 100%
Height: auto

Add Position 2 Text
Now drag a ‘Text’ element onto the page and change the text to the following:
Position 2: <br>Lye flat on your back and then slowly use your hands to arch your back into a bridge.
In the ‘Text Styles’ pane set the text to be centered and ‘Apply’ your changes.
Position 2 page should look like the following:

Set the header to ‘header_0’.
Click save .
On to content page 3…
Add Position 3 Image
Click on ‘Position 3’ in the ‘Pages’ pane.
Now in the ‘Elements’ tab we are going to add a 'Container’ element from the ‘Layout’ options and set the width and height to 100%;
Next add an ‘Image’ element and in the ‘Image Properties’ pane we will set the following:
Title: Twisted Back Stretch
Source: images/man-37264.svg
Width: 100%
Height: auto

Add Position 3 Text
Now drag a ‘Text’ element onto the page and change the text to the following:
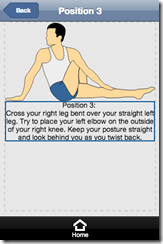
Position 3: <br> Cross your right leg bent over your straight left leg. Try to place your left elbow on the outside of your right knee. Keep your posture straight and look behind you as you twist back.
In the ‘Text Styles’ pane set the text to be centered and ‘Apply’ your changes.
Position 3 page should look like the following:
Almost done! One more…
Set the header to ‘header_0’.
Click save .
Fourth content page…
Add Position 4 Image
Click on ‘Position 4’ in the ‘Pages’ pane.
Now in the ‘Elements’ tab we are going to add a 'Container’ element from the ‘Layout’ options and set the width and height to 100%;
Next add an ‘Image’ element and in the ‘Image Properties’ pane we will set the following:
Title: Quad Stretch
Source: images/yoga-37267.svg
Width: 100%
Height: auto

Add Position 4 Text
Now drag a ‘Text’ element onto the page and change the text to the following:
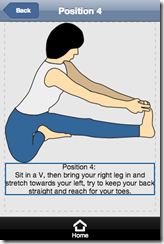
Position 4: <br>Sit in a V, then bring your right leg in and stretch towards your left, try to keep your back straight and reach for your toes.
In the ‘Text Styles’ pane set the text to be centered and ‘Apply’ your changes.
Position 4 page should look like the following:
Set the header to ‘header_0’.
Click save .
You now have some content! Lets connect it to our list…
Link to Content Pages from a List
Return to the ‘Position 1’ content page from the ‘Pages’ pane.
In the ‘Page Properties’ pane on the right you will notice the page has an ‘ID’. In this case ‘page_3’. This is the ID we need to link to to connect our list to this page.
Click on the ‘Series’ page and click on your ‘List’ element.
<a href=”#”> is an anchor tag element that hyperlinks to the reference given by the “=”. By using the ‘#’ symbol, we can link to other IDs of other elements. So to link to the ‘Position 1’ page from the first ‘Item 0’ in our list, we need to have href= point to “#page_3” because “page_3” is the ID for our content page for “Position 1”. We can rename the ID, what matters is that they are the same in the list for Position 1 and the actual ID name for the page for Position 1.
Likewise, we need to lookup the IDs for our other three position pages and link each page to the matching item in our list. Your ‘List Properties’ pane should look like the image below:
Save your work.
Your list now connects to the appropriate Position page. Lets add one more page to wrap up our app.
Lesson 7: Create Resources Page
Create a New Page
Create a new page.
Change the ‘Page Name’ to ‘Resources’.
Create a layout ‘Container’ with width and height of 100%;
From the ‘Forms’ elements, drag a ‘Button’ onto the page.

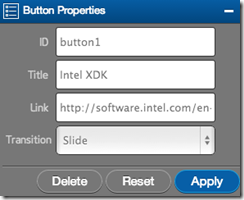
Set the ‘Button Properties’ to the following:
ID: button1
Title: Intel XDK
Transition: Slide
Set the width in the ‘Button Styles’ to be 100%;

Add Two More Buttons
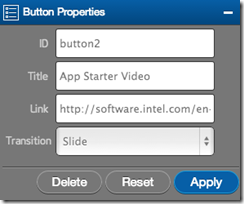
Add a second button to link to the App Starter Video with ‘Button Properties’:
ID: button2
Title: App Starter Video
Transition: Slide
And a button style with a width of 100%.
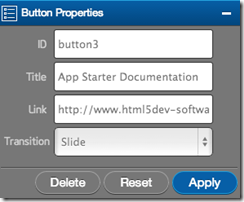
The last button you will add will be to App Starter documentation. Include ‘Button Properties’ for:
ID: button3
Title: App Starter Documentation
Link: http://www.html5dev-software.intel.com/amdocs/lib/Tutorial-CreateAppUsingAppStarter.pdf?r=8838
Transition: Slide
Set the ‘Header’ in ‘Page Properties’ to be ‘header_0’.
Save your app, and it’s time to create the footer and header!
Create a Footer
Click on the ‘Nav’ tab in the left pane.

Click on ‘header_0’ to see ‘Header Setup’ pane on the right.
Highlight and delete any text in the text field and hit ‘Apply’. The markup shown adds the Back button you see and displays the page name.
Instead type:
<h1 class="apptitle">Yoga App</h1>
Click ‘Apply’ to rename every header of your application “Yoga App”.
Remember that earlier we set each page header to ‘header_0’ which is why if you click on any of our previous pages you will see the change.
Click on Save.
Click on ‘defaultFooter’. This is the main footer we want to use for navigation on most of our pages. This is where we get to create the buttons at the bottom of the screen and connect them to actual pages!
The defaultFooter should look like the image below with only a Home button with a House icon that links to the main page.

We want to add three more buttons to our footer navigation.
Add Footer Buttons
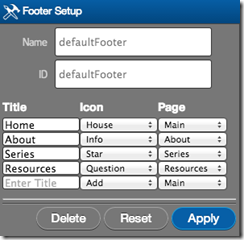
Add a ‘Title’ for ‘About’, give it an ‘Icon’ of “Info” and the ‘Page’ we want to link to is the ‘About’ page.
Add a ‘Title’ for ‘Series’, give it an ‘Icon’ of “Star” and the ‘Page’ we want to link to is the ‘Series’ page.
Add a ‘Title’ for ‘Resources’, give it an ‘Icon’ of “Question” and the ‘Page’ we want to link to is the ‘Resources’ page.
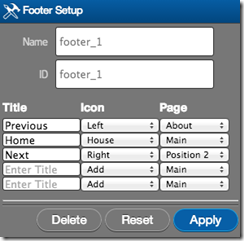
Your ‘Footer Setup’ should match the image below:
Save your work.
Lesson 8: Create Navigation
Create Custom Footers
Add four more footer items but clicking on the ‘+’ sign next to the ‘FOOTERS’ category title.
Your pane should now look like the image below.

Create Position 1 Footer
Click on ‘footer_1’ to see the corresponding ‘Footer Setup’ in the right pane. We will want to add a ‘Previous’, ‘Home’, and ‘Next’ navigation.
Think about what we want to do here, from the first content page for “Position 1” we want to go back to the About page if a user selects the “Previous”, we want to go to Main for “Home” and we want to go to Position 2 for “Next”. To map that out we need to do the following:
Add a navigation button with a ‘Title’ of “Previous”, an ‘Icon’ of “Left” and a ‘Page’ link to ‘About’ in the first row.
Add a navigation button with a ‘Title’ of “Home”, an ‘Icon’ of “House” and a ‘Page’ link to ‘Main’ in the second row.
Add a navigation button with a ‘Title’ of “Next”, an ‘Icon’ of “Right” and a ‘Page’ link to ‘Position 2’ in the third row.
Create Position 2 Footer
For ‘footer_2’:
Add a navigation button with a ‘Title’ of “Previous”, an ‘Icon’ of “Left” and a ‘Page’ link to ‘Position 1’ in the first row.
Add a navigation button with a ‘Title’ of “Home”, an ‘Icon’ of “House” and a ‘Page’ link to ‘Main’ in the second row.
Add a navigation button with a ‘Title’ of “Next”, an ‘Icon’ of “Right” and a ‘Page’ link to ‘Position 3’ in the third row.

Create Position 3 Footer
For ‘footer_3’:
Add a navigation button with a ‘Title’ of “Previous”, an ‘Icon’ of “Left” and a ‘Page’ link to ‘Position 2’ in the first row.
Add a navigation button with a ‘Title’ of “Home”, an ‘Icon’ of “House” and a ‘Page’ link to ‘Main’ in the second row.
Add a navigation button with a ‘Title’ of “Next”, an ‘Icon’ of “Right” and a ‘Page’ link to ‘Position 4’ in the third row.

Create Position 4 Footer
For ‘footer_4’:
Add a navigation button with a ‘Title’ of “Previous”, an ‘Icon’ of “Left” and a ‘Page’ link to ‘Position 3’ in the first row.
Add a navigation button with a ‘Title’ of “Home”, an ‘Icon’ of “House” and a ‘Page’ link to ‘Main’ in the second row.
Add a navigation button with a ‘Title’ of “Next”, an ‘Icon’ of “Right” and a ‘Page’ link to ‘Resources’ in the third row.

If you were not using the App Starter, you would probably just make a single footer for all four content pages and then use JavaScript to change what “Previous” and “Next” link to.
Apply Custom Footers to Pages
Now we need to go back to each of our four content pages and connect the footers we just made.
Select ‘Position 1’ page and in ‘Page Properties’ set the ‘Footer’ to ‘footer_1’.

For ‘Position 2’ use ‘footer_2’.
For ‘Position 3’ use ‘footer_3’.
For ‘Position 4’ use ‘footer_4’.
Lesson 9: Test, Debug, Build
Simulate Device
Now click on the ‘Emulate’ tab tab at the very top of the screen.

In the left ‘DEVICES’ pane, select ‘Lenovo K900’.

In the center of the screen you should see the simulation of your application running inside a skin for a Lenovo K900 phone.
Go ahead and click on ‘Home’, ‘About’, ‘Series’ and ‘Resources’ navigation buttons in the footer. You will notice your pages are now hooked up.

Next, click on ‘Series’ then ‘Position 1’ and you will be able to move forward and backwards through your list of content.
Pretty neat, right? Feel free to play around with your app.
Test on Device
Now that our app is developed and it simulates the navigation we want in the ‘EMULATE’ tab, we can test our application on an actual device.
First we want to go to the ‘TEST’ tab at the very top of the screen.

You may get the following dialog box:

Go ahead and select the grey ‘DISMISS’ button for now.
Follow the ‘App Preview Device Testing Guide’ in the left-hand pane. Copied below for your convenience:
1) Install Intel App Preview on your testing devices(s). Search “Intel App Preview” to get it in the Apple* App Store, Google* Play Store, or Windows* Phone Store.
2) Push your local files to the Testing Server to run your latest development files.
Debug on Device
If you want to debug, make sure you’ve pushed HTML files that include the Weinre script tag below.
For on device debuggin to work properly, you must:
- Have your app running in App Preview, before clicking the debug button in the ‘TEST’ tab.
- Embed the tag below into your HTML files.
EMBED THIS WEINRE TAG IN YOUR HTML FILES”
<script src="http://debug-software.intel.com/target/target-script-min.js#6WuUE875lqFAExFAVLMC1yWZ7Rtk_Rg0TCW9wwiLvvc"></script>
App Preview Setup
3) Log into Intel App Preview on your device using your Intel XDK account credentials.
4) Either use the QR code reader (native or form within App Preview) to launch your app using the code to the right or Click the Server Apps tab located in the bottom nav bar of App Preview and navigate to your desired app product.
5) Click the Launch This App button and begin testing your app on device.
Scan the QR code provided in the ‘TEST’ tab to launch your app in App Preview.

Build for iOS
Click on the ‘BUILD’ tab at the top of the screen.
Here you can see all the stores you can build for. Click on iOS Production to build for Apple* iOS.

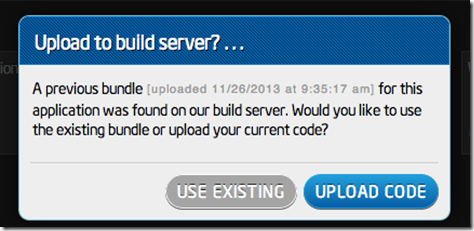
When the prompt below appears, select ‘USE EXISTING’ to prevent uploading your app again to the server without changes being made.
From the overview pane, you can easily see that your app will not build for iOS. You have to go through Apple* provisioning process and pay for certification to be an iOS developer before you can build or publish your app to the Apple* store. Links for walkthroughs are provided below. But for now we are going to move on and build for an Android* phone.

Click on the ‘CLOSE BUILD’ button in the top left corner and then click on the blue ‘BUILD’ button for Android.
Build for Android

In this Overview you will see your app already build for Android without having to do anything. If a red X appears you can click on that topic for a guided walkthrough of how to fix your application.

Click on the big green ‘Build App Now’ button on the right and hopefully you will see the screen below:

This means our application build for Android and we have the option of downloading an .apk file to submit to a store or load on our phone or emailing it to ourselves. We recommend you enter an email address and open the email on an Android phone to install the .apk. You might need to enable apps from third-party sources in your phone settings.
Good luck and congratulations!
You just developed a mobile application, ran it in a simulator, tested it on your device, and built it for Android!
Beautiful, very beautiful
ReplyDeleteSir, Really nice tutorial. How to set up back button in a page?
ReplyDeleteI setup a button and link to main page. but its not working yet