Apache Cordova Camera API is documented athttp://cordova.apache.org/docs/en/2.9.0/cordova_camera_camera.md.html#Camera
Camera API
The camera object provides access to the device's default camera application.
Important privacy note: Collection and use of images from a device's camera raises important privacy issues. Your app'sprivacy policy should discuss how the app uses the camera and whether the images recorded are shared with any other parties. In addition, if the app's use of the camera is not apparent in the user interface, you should provide a just-in-time notice prior to your app accessing the camera (if the device operating system doesn't do so already). That notice should provide the same information noted above, as well as obtaining the user's permission (e.g., by presenting choices for "OK" and "No Thanks"). For more information, please see the Privacy Guide.
Methods:
STEPS
1) Browse the documentation page
2) Scroll down the page to find the Full Example
<!DOCTYPE html>
<html>
<head>
<title>Capture Photo</title>
<script type="text/javascript" charset="utf-8" src="cordova.js"></script>
<script type="text/javascript" charset="utf-8">
var pictureSource; // picture source
var destinationType; // sets the format of returned value
// Wait for device API libraries to load
//
document.addEventListener("deviceready",onDeviceReady,false);
// device APIs are available
//
function onDeviceReady() {
pictureSource=navigator.camera.PictureSourceType;
destinationType=navigator.camera.DestinationType;
}
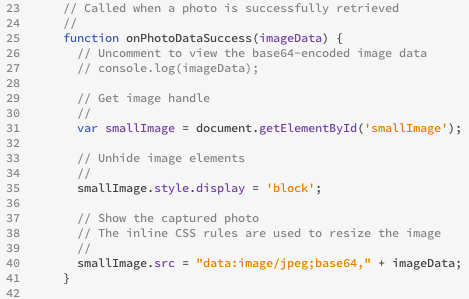
// Called when a photo is successfully retrieved
//
function onPhotoDataSuccess(imageData) {
// Uncomment to view the base64-encoded image data
// console.log(imageData);
// Get image handle
//
var smallImage = document.getElementById('smallImage');
// Unhide image elements
//
smallImage.style.display = 'block';
// Show the captured photo
// The inline CSS rules are used to resize the image
//
smallImage.src = "data:image/jpeg;base64," + imageData;
}
// Called when a photo is successfully retrieved
//
function onPhotoURISuccess(imageURI) {
// Uncomment to view the image file URI
// console.log(imageURI);
// Get image handle
//
var largeImage = document.getElementById('largeImage');
// Unhide image elements
//
largeImage.style.display = 'block';
// Show the captured photo
// The inline CSS rules are used to resize the image
//
largeImage.src = imageURI;
}
// A button will call this function
//
function capturePhoto() {
// Take picture using device camera and retrieve image as base64-encoded string
navigator.camera.getPicture(onPhotoDataSuccess, onFail, { quality: 50,
destinationType: destinationType.DATA_URL });
}
// A button will call this function
//
function capturePhotoEdit() {
// Take picture using device camera, allow edit, and retrieve image as base64-encoded string
navigator.camera.getPicture(onPhotoDataSuccess, onFail, { quality: 20, allowEdit: true,
destinationType: destinationType.DATA_URL });
}
// A button will call this function
//
function getPhoto(source) {
// Retrieve image file location from specified source
navigator.camera.getPicture(onPhotoURISuccess, onFail, { quality: 50,
destinationType: destinationType.FILE_URI,
sourceType: source });
}
// Called if something bad happens.
//
function onFail(message) {
alert('Failed because: ' + message);
}
</script>
</head>
<body>
<button onclick="capturePhoto();">Capture Photo</button> <br>
<button onclick="capturePhotoEdit();">Capture Editable Photo</button> <br>
<button onclick="getPhoto(pictureSource.PHOTOLIBRARY);">From Photo Library</button><br>
<button onclick="getPhoto(pictureSource.SAVEDPHOTOALBUM);">From Photo Album</button><br>
<img style="display:none;width:60px;height:60px;" id="smallImage" src="" />
<img style="display:none;" id="largeImage" src="" />
</body>
</html>
|
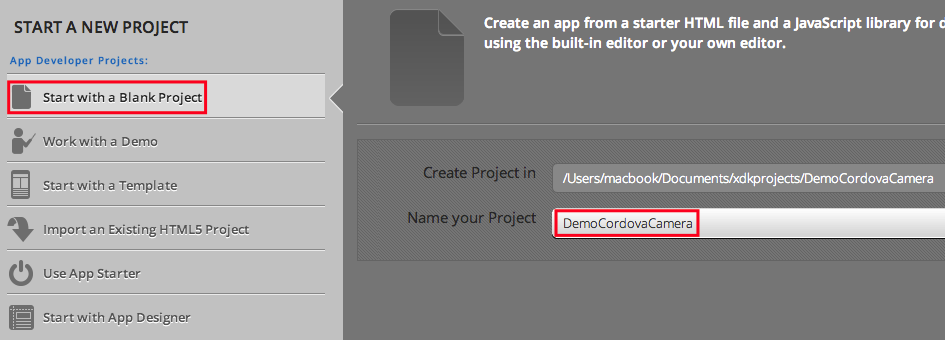
3) Run Intel XDK and create a new Blank Project
Type the project name as DemoCordovaCamera.
4) Replace the index file with the above codes

5) Debug the project
5.1) Connect Android device and launch project.

5.2) Observe the outcome

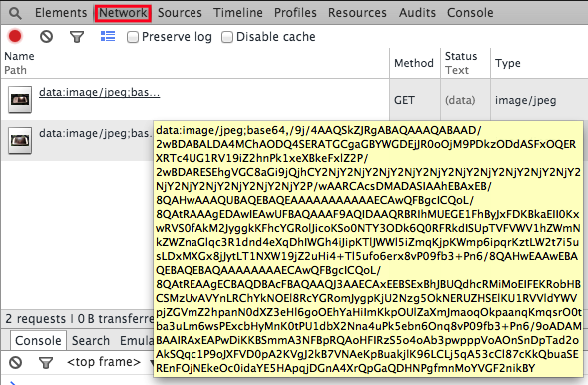
6) View the generated HTML codes
6.1) If you view the generated HTML codes in Elements tab, you will see that the image is represented as a String containing the base64-encoded photo image

6.2) The function onPhotoDataSuccess () has an image data as its argument.
7) DATA_URL and FILE_URI
This codes example demonstrates both DATA_URL and FILE_URI
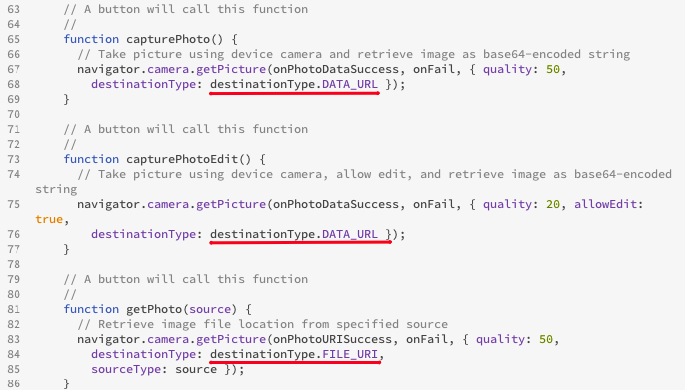
8) Change DestinationType
8.1) In the above code, on line no. 68, the captured image is coded as image data.
8.2) In order to save the image as file, we need to change destinationType value as destinationType.FILE_URI.
8.3) Change as follows:

8.4) You may get error in Debug window.
Since you have changed the value into a file path (FILE_URI) instead of image data (DATA_URL), the generated HTML becomes invalid.

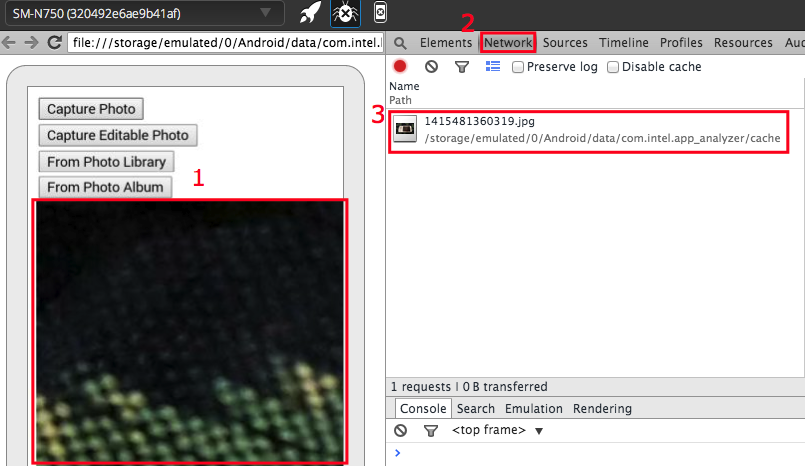
8.5) To solve this issue temporarily, change the callback function to onPhotoURISuccess

8.6) Errors has been fixed now.
Besides that, notice that the image is stored as file:///storage/emulated/0/Android/data/com.intel.app_analyzer/cache/{some numbers}.jpg
9) saveToPhotoAlbum option
The image that you have captured remains in the project storage and by default will not be included in the Photo Album.
9.1) To include the image in Photo Album, add another parameter, saveToPhotoAlbum:true.

No comments:
Post a Comment