Tutorial Using the App Starter and the App Framework Part1
Tutorial Using the App Starter and the App Framework to Create a Mobile Application
Copied from: https://software.intel.com/en-us/html5/articles/using-the-intel-app-starter-to-create-a-mobile-application
PART 1
Lesson 1: Get Started
1) Summary
1.1) In this article we want to cover how to make a mobile application using App Starter and App Framework within the Intel XDK.
1.2) App Starter is great for multi-page simple applications that have a few pages of content and a footer at the bottom to quickly navigate between the pages.
1.4) The idea behind this tutorial is to show how a beginner can make an application using the Intel XDK even if they are not familiar with HTML, CSS, or JavaScript.
1.5) We’ll make a very simple application that provides a landing page, about page, a list of content, and a resources page.
1.6) If you are more familiar with these technologies, we suggest you try App Designer as your layout tool which is documented here. Let’s start.
2) Decide on an App Idea
2.1) When thinking of an idea for an application, try to think of an application that solves a problem.
2.2) For this tutorial, our problem is that we have a yoga routine we can't remember when we travel so we want an app that walks us through our routine.
2.3) When you are learning to write apps, look through the app stores and try to emulate simpler versions of some common applications: a calculator, a simple game, a todo list, etc.
3) Create a Project
3.1) Open up the XDK and select ’Start a New Project’ in the bottom left-hand side of the screen.

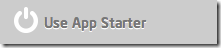
3.2) Under the ‘START NEW APP’ options in the left pane, select ‘Use App Starter’.
3.3) In the right pane we will name the project ‘YogaAppStaterApp’ and select a project location, in this case a folder with the same name on our desktop.
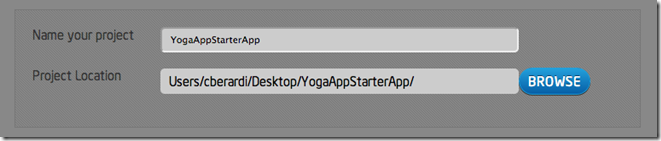
3.4) Click the ‘CREATE’ button in the bottom right corner of the screen.

3.5) If this is your first time using the Intel XDK, you may see the following prompt:

3.6) Feel free to take the Quick Tour or select ‘Don’t show this again’ to prevent this dialog from appearing again. TIP: Note that once you select ‘Don’t show this again’ you will not be able to get back to the Quick Tour later. For now we will click ‘No Thanks’.
4) Use the Develop Tab
4.1) Click on the ‘Develop’ tab at the top, if you are not there already.

4.2) You should see a blank screen with the following navigation pane on the left.
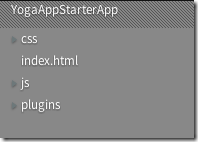
4.3) Double-click on ‘index.html’.
TIP: If you single click the file will load, but double clicking a file adds it to your ‘Working Files’ and makes it easier to come back to later.
4.4) You should see two buttons at the top of the screen for CODE and DESIGN:

4.5) These buttons will let you switch between the code editor and the App Starter. Make sure the ‘DESIGN’ button is selected, and you should see a pane like this:
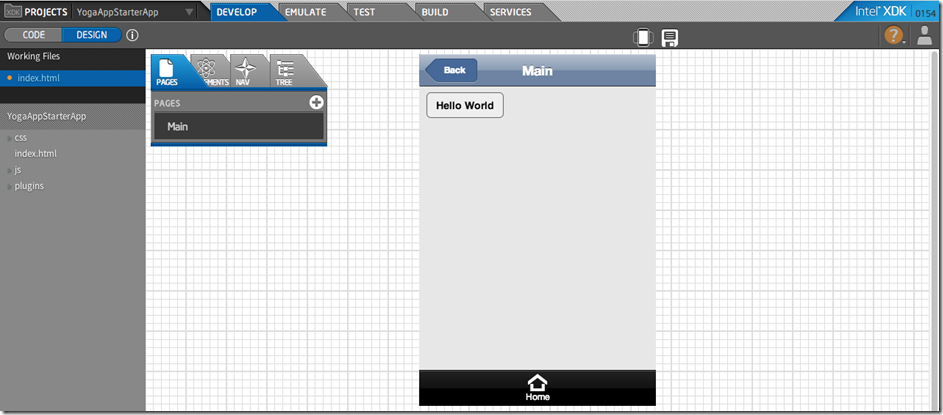
4.6) You can toggle back and forth between 'CODE' to view and edit code in the Adobe Brackets* editor, and 'DESIGN' to work with App Starter to drag and drop elements in a GUI (graphical user interface). For this project we will use App Starter in the 'DESIGN' view, but feel free to use the 'CODE' view to look at the HTML and CSS generated as you drag and drop elements into your application.
Lesson 2: Design
5) Design the App Layout
5.1) Typically a developer will get initial input from a designer on the layout of the application or storyboard. The most common deliverable from a designer is a wireframe. For this project, I have provided the following wireframe which we will use to guide our application layout. This wireframe or mock-up was created using Balsamiq*’s Web App and can be found here.

Click to enlarge the image above in a new tab.
5.2) Usually a wireframe like the one above is enough for a developer to get to work. Many developers will use temporary or placeholder images while a designer or artist creates final images or ‘assets’ to make the application look professional. We are going to need some placeholder images from the web. You don’t need to have an art degree to create a good looking application, there are several websites where you can collaborate with designers or public domain artwork libraries on the web.
TIP: It is a good idea to check all licensing on image files and make sure that any images you get from the web are license under the CC0 or ‘No Copyright Creative Commons’ license which states:
"The person who associated a work with this deed has dedicated the work to the public domain by waiving all of his or her rights to the work worldwide under copyright law, including all related and neighboring rights, to the extent allowed by law.
You can copy, modify, distribute and perform the work, even for commercial purposes, all without asking permission."
6) Get Project Files
6.1) Today, we’re going to grab our images off of Pixabay* that generally serves up CC0 images. Remember to ALWAYS check your license files on images you use. Even sites like Pixabay* often have featured or advertised content that is not CC0 licensed.
6.2) For this lab, I searched for keywords ‘meditation’ and ‘yoga’ and downloaded the following SVG images:
6.3) For your convenience, we've provided a zip file containing all the images. Click on the 'Download' button below:
6.4) Unzip the images, navigate to your desktop (or alternate path if you browsed to a different project location) to find the app folder, and place them in the YogaAppStarterApp folder as shown below.
TIP: The reason we used SVG images which have the file extension ‘.svg’ is because Scalable Vector Graphics are just that, scalable, and can resize without distorting the image. They are usually relatively small and good for line-art or clipart like we are using here. It also prevents us from having to have very large images that will bloat the memory of our application or very small images that get distorted on a larger screen.
7) Add Files to the Project
7.1) Once you have the images in the correct folder, return to the Intel XDK and right-click on the file list to the left.

7.2) Select ‘Refresh File Tree’ to see your new files. You should see an ‘images’ folder appear and it will take a few seconds to load all your files. The panel will turn a darker grey while the images load.
7.3) If you click on the the arrow to the left of the ‘images’ folder you will see your five files have loaded.


7.4) Now let’s learn how to use these images!
8) Remove 'Hello World' Button
8.1) Every app has a page the user of an application sees first. We often call this the ‘home’, ‘main’ or ‘landing’ page. Sometimes you will hear the phrase ‘splash screen’ if the first page is only visible for a few seconds while the application loads. For our main page we are going to add an image and some welcome text.
8.2) In the App Starter, the first page has been created for us with a button for ‘Hello World’, which we don’t need, so we are going to delete it.

8.3) Click on the ‘Hello World’ button shown in the center of the screen.
8.4) You should see the ‘Page Properties’ turned into ‘Button Properties’ on the right-hand side of the screen.
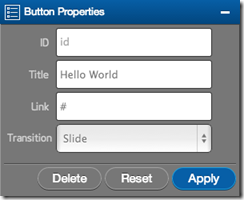
8.5) Click on the ‘Delete’ button to delete the 'Hello World' button in the application. A dialog box will appear…

8.6) Click the blue button for ‘CONFIRM’ to delete the button and you will see the button disappear.
Lesson 3: Create Home Page
9) Add a Layout Element
9.1) Next we are going to add a layout.
9.2) Click the ‘Elements’ tab in the left toolbar to display some layout elements.

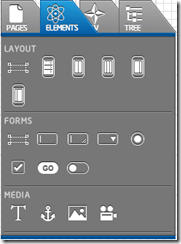
9.3) Drag and drop the first 'Container' element under 'Layout' onto your application canvas in the center of the screen.


9.4) You’ll notice the ‘Container Styles’ on the right has the width of 100%. We are going to add a height of 100% also so that our main page stretches to fill any screen size.

9.5) Type ‘height:100%;’ into the ‘Container Styles’ box and click the blue ‘Apply’ button to see your Container layout change size.
TIP: Any time you are writing styles be sure to add a semi-colon to the end of each style ‘;’ so that the browser knows to check the next line for more styles.
10) Add an Image Element
10.1) Next we are going to add an ‘Image’ to the ‘Container’.
10.2) Drag the landscape icon or 'Image' element into the 'Container' or blue box in the center of the main application page.

10.3) In the right-hand ‘Image Properties’ pane set the following properties:
Title: Meditation Monk
Source: images/enlightenment-154910.svg
Width: 100%
Height: auto

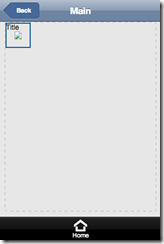
10.4) If you hover your mouse over the image without clicking on anything you will see the title 'Meditation Monk' appear by your cursor.
TIP: The source tells the browser which image to load, in this case, the image of the monk from your ‘images’ folder. You always need to include the path from where your styles are, in this case the .html file which is in the root or top level folder. So to get to our images we need to look inside the images folder and need to prefix all file names with ‘images/’.
11) Apply Styles to an Image
11.1) We set the width to be 100% of the screen width, and using ‘auto’ for height will ensure our image scales proportionally to the width and doesn’t stretch.
11.2) Click the blue ‘Apply’ button to see your image magically appear and resize to 100% of the application width.

Ommmmmmmm…
Behold! We have a meditating monk! Lets add a greeting.
12) Add a Text Element
12.1) In the ‘Elements’ tab and under the 'MEDIA' section, select the ‘Text’ element and drag it under the monk image.


12.2) In the right-hand pane, change ‘Your text here’ to ‘Welcome!’. You’ll notice it is a bit off center. Lets center it!
12.3) In the ‘Text Styles’ pane to the bottom-right we are going to center the text by typing:
text-align: center;

12.4) Click the blue ‘Apply’ button to see the text center.
13) Set the Page Header
13.1) Before we move on we are going to set the page header so we don’t have to come back to it later.
13.2) Click on the left pane ‘Pages’ tab and select your ‘Main’ page so the ‘Page Properties’ appears in the top right pane.


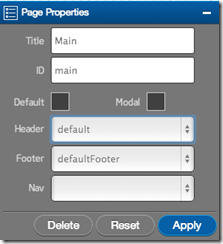
13.3) Change the ‘Header’ to from 'default' to ‘header_0’ and click the blue ‘Apply’ button.

13.4) ‘header_0’ is just the name of the another header (we can change the name later if we want) other than the default. ‘default’ only has a ‘Home’ button and eventually we will want more navigation buttons to connect our new pages to. We will need to do this to every new page we create.
That’s it for the main page!
NEXT PART
---
No comments:
Post a Comment