1) Reference
2) Full Example
<!DOCTYPE html>
<html>
<head>
<title>Capture Photo</title>
<script type="text/javascript" charset="utf-8" src="cordova.js"></script>
<script type="text/javascript" charset="utf-8">
var pictureSource; // picture source
var destinationType; // sets the format of returned value
// Wait for device API libraries to load
//
document.addEventListener("deviceready",onDeviceReady,false);
// device APIs are available
//
function onDeviceReady() {
pictureSource=navigator.camera.PictureSourceType;
destinationType=navigator.camera.DestinationType;
}
// Called when a photo is successfully retrieved
//
function onPhotoDataSuccess(imageData) {
// Uncomment to view the base64-encoded image data
// console.log(imageData);
// Get image handle
//
var smallImage = document.getElementById('smallImage');
// Unhide image elements
//
smallImage.style.display = 'block';
// Show the captured photo
// The inline CSS rules are used to resize the image
//
smallImage.src = "data:image/jpeg;base64," + imageData;
}
// Called when a photo is successfully retrieved
//
function onPhotoURISuccess(imageURI) {
// Uncomment to view the image file URI
// console.log(imageURI);
// Get image handle
//
var largeImage = document.getElementById('largeImage');
// Unhide image elements
//
largeImage.style.display = 'block';
// Show the captured photo
// The inline CSS rules are used to resize the image
//
largeImage.src = imageURI;
}
// A button will call this function
//
function capturePhoto() {
// Take picture using device camera and retrieve image as base64-encoded string
navigator.camera.getPicture(onPhotoDataSuccess, onFail, { quality: 50,
destinationType: destinationType.DATA_URL });
}
// A button will call this function
//
function capturePhotoEdit() {
// Take picture using device camera, allow edit, and retrieve image as base64-encoded string
navigator.camera.getPicture(onPhotoDataSuccess, onFail, { quality: 20, allowEdit: true,
destinationType: destinationType.DATA_URL });
}
// A button will call this function
//
function getPhoto(source) {
// Retrieve image file location from specified source
navigator.camera.getPicture(onPhotoURISuccess, onFail, { quality: 50,
destinationType: destinationType.FILE_URI,
sourceType: source });
}
// Called if something bad happens.
//
function onFail(message) {
alert('Failed because: ' + message);
}
</script>
</head>
<body>
<button onclick="capturePhoto();">Capture Photo</button> <br>
<button onclick="capturePhotoEdit();">Capture Editable Photo</button> <br>
<button onclick="getPhoto(pictureSource.PHOTOLIBRARY);">From Photo Library</button><br>
<button onclick="getPhoto(pictureSource.SAVEDPHOTOALBUM);">From Photo Album</button><br>
<img style="display:none;width:60px;height:60px;" id="smallImage" src="" />
<img style="display:none;" id="largeImage" src="" />
</body>
</html>
|
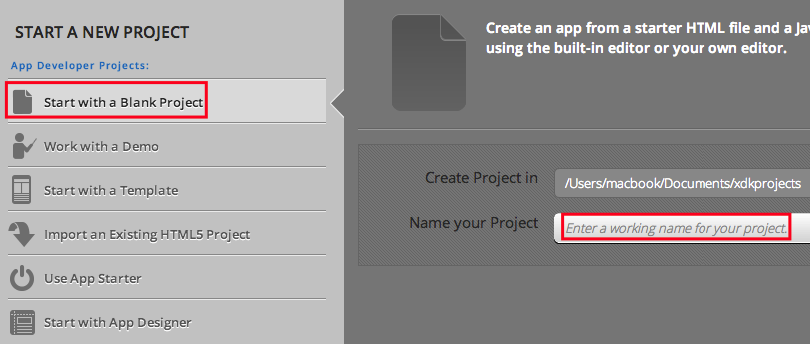
3) Create a new project using Blank Template
Project Name: demoCordovaCamera
4) Replace Index file

5) Debug
5.1) Connect Device
5.2) Launch Project
5.2) Debug Project

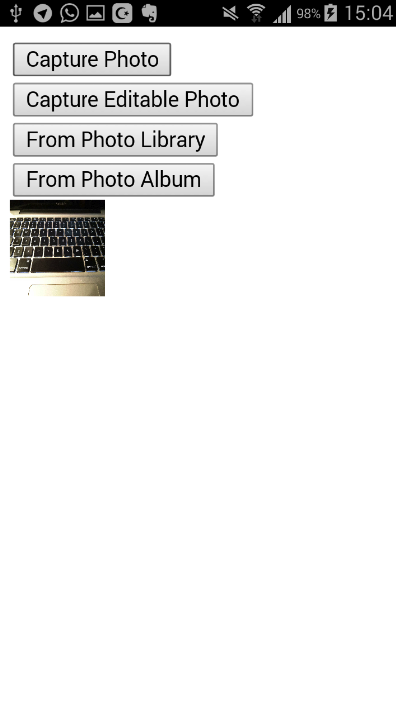
6) Screenshot
7) Build Project
Select required plug-ins before building the apps.

8) Download
Project Source Code: https://drive.google.com/file/d/0B86b-ALn-1MGLWN2THV1WmlfRU0/view?usp=sharing
Download APK:
9) Additional Exercise (Upload to PHP server)
We are going to modify the codes so that after the user picks a photo from the album, the app will upload it to the server.
You need a functioning PHP server to serve as a back end for this exercise.
|
9.1) modify the getPhoto function as follows
function getPhoto(source) {
// Retrieve image file location from specified source
navigator.camera.getPicture(sendPhoto, onFail, { quality: 50,
destinationType: destinationType.FILE_URI,
sourceType: source });
}
|
9.2) add new codes below the function onDeviceReady()
//***demo
function clearCache() {
navigator.camera.cleanup();
}
var retries = 0;
function sendPhoto(fileURI) {
//***optional part in case you want to see the image on the screen
document.getElementById('largeImage').innerHTML=fileURI;
var largeImage = document.getElementById('largeImage');
// Unhide image elements
//
largeImage.style.display = 'block';
// Show the captured photo
// The inline CSS rules are used to resize the image
//
largeImage.src = fileURI;
//***end optional part
var win = function (r) {
clearCache();
retries = 0;
alert('Done!');
}
var fail = function (error) {
if (retries == 0) {
retries ++
setTimeout(function() {
onCapturePhoto(fileURI)
}, 1000)
} else {
retries = 0;
clearCache();
alert('Ups. Something wrong happens!');
}
}
var options = new FileUploadOptions();
options.fileKey = "file";
options.fileName = fileURI.substr(fileURI.lastIndexOf('/') + 1);
options.mimeType = "image/jpeg";
options.params = {}; // if we need to send parameters to the server request
var ft = new FileTransfer();
ft.upload(fileURI, encodeURI("http://{domain-name}/{folder-name}/sendData.php"), win, fail, options);
}
//***enddemo
|
9.3) Add the following sendData.php file to your PHP server.
<?php
//upload to a sub folder “upload”
move_uploaded_file($_FILES["file"]["tmp_name"],"./upload/" . $_FILES["file"]["name"]);
?>
|
Refer Step 9.2, don't forget to add File Transfer API in your Cordova Plugin Settings. see example http://i.imgur.com/HC3idJA.png
ReplyDeleteHi, great tutorial. Can you give me your project+apk that contain upload to server because I have been try all your tutorial but not working. Thanks
ReplyDeleteHi,am i tried it but dint work ,is thre a part to refrence form id in script so as when i press button form data is sent,or can we just use simple ajax for sending multipart data.I tried using it it gave me network error issue.
ReplyDelete