111 XDK: Create Ionic ngCordova Calendar Test Project
This tutorial demonstrates the steps to create an Ionic ngCordova Calendar Test Project based on Ionic Framework Starter Template.
This tutorial uses Intel XDK version 3759.
Download a sample project ionicBlank.zip into your download folder.
Unzip the file.
You should find www folder in it.
Rename the parent folder (ionicBlank) as ionicNgCordovaCalendarTest.

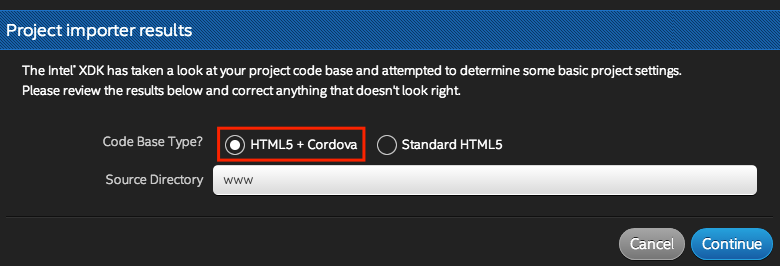
1) Create a new project
Select Import Your HTML5 Code Base.
Select the unzipped folder in the download folder.


When you are asked to type a new project name, enter ionicNgCordovaCalendarTest .

Success.
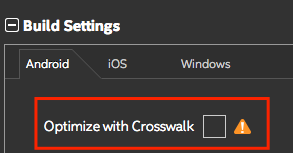
Optionally, you may choose not to optimize with crosswalk (resulting with smaller package file size but having a risk of not compatible with various versions of android)
Take note of the imported location.
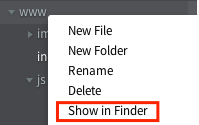
In case you are not sure, you can right-click the www folder and select Show in Finder (Mac) or Open in Explorer (Win).
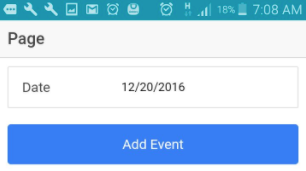
2) Add UI Codes.
We are going to add UI objects for Date Input and Button.
Add the highlighted codes to page.html .
File: www/templates/page.html
<ion-view title="Page" id="page1">
<ion-content padding="true" class="has-header">
<form id="page-form1" class="list">
<label class="item item-input" id="page-input1">
<span class="input-label">Date</span>
<input type="date" placeholder="">
</label>
</form>
<button id="page-button1" ng-click="addMyEvent()" class="button button-positive button-block">
Add Event
</button>
</ion-content>
</ion-view>
|
3) Simulate.

4) Import ngCordova and Calendar files
b) Calendar.js ( download it here )

3) Add Calendar Plug In
We are going to add cordova-plugin-calendar located at https://www.npmjs.com/package/cordova-plugin-calendar
This plugin allows you to manipulate the native calendar.
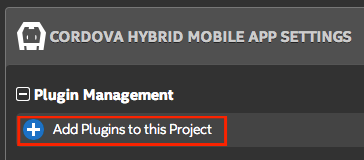
Go to Project Page and find the Plugin Management.
Click Add Plugins to this project.
Select Third-Party Plugins
Select Plugin Source: npm
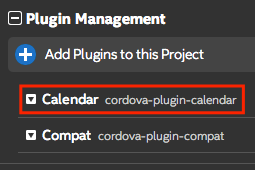
Set Plugin ID = cordova-plugin-calendar
Click Add Plugin

Wait for the fetching process.

Fetching successful.

4) Edit Header Item (for index.html)
File: www/index.html
<!DOCTYPE html>
<html>
<head>
<meta charset="utf-8">
<meta name="viewport" content="initial-scale=1, maximum-scale=1, user-scalable=no, width=device-width">
<title></title>
<link href="lib/ionic/css/ionic.css" rel="stylesheet">
<script src="lib/ionic/js/ionic.bundle.js"></script>
<script src="js/ng-cordova.js"></script>
<script src="cordova.js"></script>
<script src="js/app.js"></script>
<script src="js/controllers.js"></script>
<script src="js/routes.js"></script>
<script src="js/services.js"></script>
<script type="text/javascript" src="js/Calendar.js"></script>
</head>
<body ng-app="app" animation="slide-left-right-ios7">
<div>
<div>
<ion-nav-bar class="bar-stable">
<ion-nav-back-button></ion-nav-back-button>
</ion-nav-bar>
<ion-nav-view></ion-nav-view>
</div>
</div>
</body>
</html>
|
5) Edit Page.
File: www/templates/page.html
<ion-view title="Page" id="page1">
<ion-content padding="true" class="has-header">
<form id="page-form1" class="list">
<label class="item item-input" id="page-input1">
<span class="input-label">Date</span>
<input type="date" placeholder="" ng-model="testform.testdate">
</label>
</form>
<button id="page-button1" ng-click="addMyEvent()" class="button button-positive button-block">
Add Event
</button>
</ion-content>
</ion-view>
|
6) Edit Controller.
Add ngCordova module to ionic app.
File: www/js/apps.js
// Ionic Starter App
// angular.module is a global place for creating, registering and retrieving Angular modules
// 'starter' is the name of this angular module example (also set in a <body> attribute in index.html)
// the 2nd parameter is an array of 'requires'
// 'starter.services' is found in services.js
// 'starter.controllers' is found in controllers.js
angular.module('app', ['ionic', 'app.controllers', 'app.routes', 'app.directives','app.services','ngCordova',])
.config(function($ionicConfigProvider, $sceDelegateProvider){
$sceDelegateProvider.resourceUrlWhitelist([ 'self','*://www.youtube.com/**', '*://player.vimeo.com/video/**']);
})
.run(function($ionicPlatform) {
$ionicPlatform.ready(function() {
// Hide the accessory bar by default (remove this to show the accessory bar above the keyboard
// for form inputs)
if (window.cordova && window.cordova.plugins && window.cordova.plugins.Keyboard) {
cordova.plugins.Keyboard.hideKeyboardAccessoryBar(true);
cordova.plugins.Keyboard.disableScroll(true);
}
if (window.StatusBar) {
// org.apache.cordova.statusbar required
StatusBar.styleDefault();
}
});
})
/*
This directive is used to disable the "drag to open" functionality of the Side-Menu
when you are dragging a Slider component.
*/
.directive('disableSideMenuDrag', ['$ionicSideMenuDelegate', '$rootScope', function($ionicSideMenuDelegate, $rootScope) {
return {
restrict: "A",
controller: ['$scope', '$element', '$attrs', function ($scope, $element, $attrs) {
function stopDrag(){
$ionicSideMenuDelegate.canDragContent(false);
}
function allowDrag(){
$ionicSideMenuDelegate.canDragContent(true);
}
$rootScope.$on('$ionicSlides.slideChangeEnd', allowDrag);
$element.on('touchstart', stopDrag);
$element.on('touchend', allowDrag);
$element.on('mousedown', stopDrag);
$element.on('mouseup', allowDrag);
}]
};
}])
/*
This directive is used to open regular and dynamic href links inside of inappbrowser.
*/
.directive('hrefInappbrowser', function() {
return {
restrict: 'A',
replace: false,
transclude: false,
link: function(scope, element, attrs) {
var place = attrs['hrefInappbrowser'] || '_system';
element.bind('click', function (event) {
var href = event.currentTarget.href;
window.open(href, place, 'location=yes');
event.preventDefault();
event.stopPropagation();
});
}
};
});
|
Add controller codes to perform the task
File: www/js/controllers.js
angular.module('app.controllers', [])
.controller('pageCtrl', ['$scope', '$stateParams', '$cordovaCalendar',// The following is the constructor function for this page's controller. See https://docs.angularjs.org/guide/controller
// You can include any angular dependencies as parameters for this function
// TIP: Access Route Parameters for your page via $stateParams.parameterName
function ($scope, $stateParams, $cordovaCalendar) {
$scope.testform = {};
$scope.addMyEvent = function () {
alert(new Date($scope.testform.testdate));
// beware: month 0 = january, 11 = december
$cordovaCalendar.createEvent({
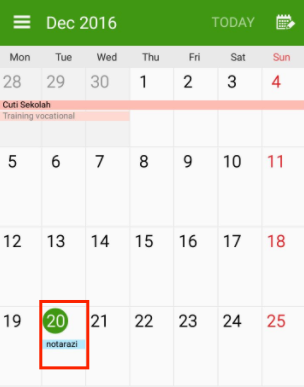
title: 'notarazi',
location: 'Malaysia',
notes: 'tutorial',
startDate: new Date($scope.testform.testdate),
endDate: new Date($scope.testform.testdate)
}).then(function (result) {
// success
alert('success');
}, function (err) {
// error
alert('error');
});
};
}])
|
7) Simulate.

8) Build.
If you have not configured the Build Requirement, read the steps in http://xdk-steps.blogspot.my/2016/12/104-xdk-how-to-build-cordova-for-android.html .
Otherwise, select the target platform and click Build.

Wait for the process to complete.


No comments:
Post a Comment