---
Tutorial Using the App Starter and the App Framework to Create a Mobile Application
Copied from: https://software.intel.com/en-us/html5/articles/using-the-intel-app-starter-to-create-a-mobile-application
PART 3
Lesson 7: Create Resources Page
29) Create a New Page
29.1) Create a new page.
29.2) Change the ‘Page Name’ to ‘Resources’.
29.3) Create a layout ‘Container’ with width and height of 100%;
29.4) From the ‘Forms’ elements, drag a ‘Button’ onto the page.

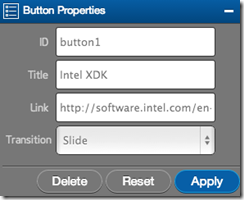
29.5) Set the ‘Button Properties’ to the following:
ID: button1
Title: Intel XDK
Transition: Slide
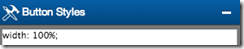
29.6) Set the width in the ‘Button Styles’ to be 100%;
30) Add Two More Buttons
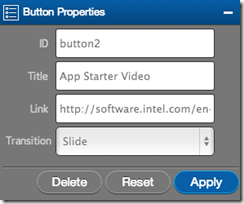
30.1) Add a second button to link to the App Starter Video with ‘Button Properties’:
ID: button2
Title: App Starter Video
Transition: Slide
30.2) And a button style with a width of 100%.
30.3) The last button you will add will be to App Starter documentation. Include ‘Button Properties’ for:
ID: button3
Title: App Starter Documentation
Link: http://www.html5dev-software.intel.com/amdocs/lib/Tutorial-CreateAppUsingAppStarter.pdf?r=8838
Transition: Slide

30.4) Set the ‘Header’ in ‘Page Properties’ to be ‘header_0’.
30.5) Save your app, and it’s time to create the footer and header!
31) Create a Footer
31.1) Click on the ‘Nav’ tab in the left pane.

31.2) Click on ‘header_0’ to see ‘Header Setup’ pane on the right.
31.3) Highlight and delete any text in the text field and hit ‘Apply’. The markup shown adds the Back button you see and displays the page name.
31.4) Instead type:
<h1 class="apptitle">Yoga App</h1>
31.5) Click ‘Apply’ to rename every header of your application “Yoga App”.
31.6) Remember that earlier we set each page header to ‘header_0’ which is why if you click on any of our previous pages you will see the change.
31.7) Click on Save.
31.8) Click on ‘defaultFooter’. This is the main footer we want to use for navigation on most of our pages. This is where we get to create the buttons at the bottom of the screen and connect them to actual pages!
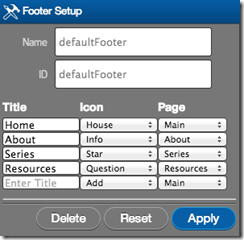
31.9) The defaultFooter should look like the image below with only a Home button with a House icon that links to the main page.
31.10) We want to add three more buttons to our footer navigation.
We want to add three more buttons to our footer navigation.
32) Add Footer Buttons
32.1) Add a ‘Title’ for ‘About’, give it an ‘Icon’ of “Info” and the ‘Page’ we want to link to is the ‘About’ page.
32.2) Add a ‘Title’ for ‘Series’, give it an ‘Icon’ of “Star” and the ‘Page’ we want to link to is the ‘Series’ page.
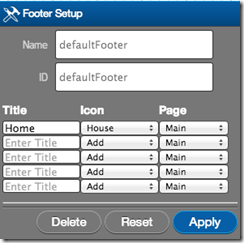
32.3) Add a ‘Title’ for ‘Resources’, give it an ‘Icon’ of “Question” and the ‘Page’ we want to link to is the ‘Resources’ page.
32.4) Your ‘Footer Setup’ should match the image below:
32.5) Save your work.
Lesson 8: Create Navigation
33) Create Custom Footers
33.1) Add four more footer items but clicking on the ‘+’ sign next to the ‘FOOTERS’ category title.

33.2) Your pane should now look like the image below.

34) Create Position 1 Footer
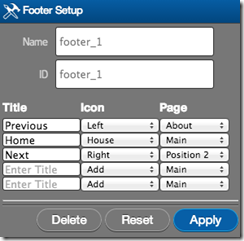
34.1) Click on ‘footer_1’ to see the corresponding ‘Footer Setup’ in the right pane. We will want to add a ‘Previous’, ‘Home’, and ‘Next’ navigation.
34.2) Think about what we want to do here, from the first content page for “Position 1” we want to go back to the About page if a user selects the “Previous”, we want to go to Main for “Home” and we want to go to Position 2 for “Next”. To map that out we need to do the following:
34.3) Add a navigation button with a ‘Title’ of “Previous”, an ‘Icon’ of “Left” and a ‘Page’ link to ‘About’ in the first row.
34.4) Add a navigation button with a ‘Title’ of “Home”, an ‘Icon’ of “House” and a ‘Page’ link to ‘Main’ in the second row.
34.5) Add a navigation button with a ‘Title’ of “Next”, an ‘Icon’ of “Right” and a ‘Page’ link to ‘Position 2’ in the third row.
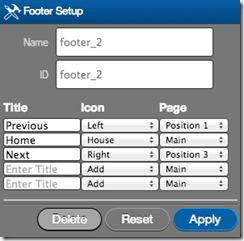
35) Create Position 2 Footer
35.1) For ‘footer_2’:
a) Add a navigation button with a ‘Title’ of “Previous”, an ‘Icon’ of “Left” and a ‘Page’ link to ‘Position 1’ in the first row.
b) Add a navigation button with a ‘Title’ of “Home”, an ‘Icon’ of “House” and a ‘Page’ link to ‘Main’ in the second row.
c) Add a navigation button with a ‘Title’ of “Next”, an ‘Icon’ of “Right” and a ‘Page’ link to ‘Position 3’ in the third row.
36) Create Position 3 Footer
36.1) For ‘footer_3’:
a) Add a navigation button with a ‘Title’ of “Previous”, an ‘Icon’ of “Left” and a ‘Page’ link to ‘Position 2’ in the first row.
b) Add a navigation button with a ‘Title’ of “Home”, an ‘Icon’ of “House” and a ‘Page’ link to ‘Main’ in the second row.
c) Add a navigation button with a ‘Title’ of “Next”, an ‘Icon’ of “Right” and a ‘Page’ link to ‘Position 4’ in the third row.

37) Create Position 4 Footer
37.1) For ‘footer_4’:
a) Add a navigation button with a ‘Title’ of “Previous”, an ‘Icon’ of “Left” and a ‘Page’ link to ‘Position 3’ in the first row.
b) Add a navigation button with a ‘Title’ of “Home”, an ‘Icon’ of “House” and a ‘Page’ link to ‘Main’ in the second row.
c) Add a navigation button with a ‘Title’ of “Next”, an ‘Icon’ of “Right” and a ‘Page’ link to ‘Resources’ in the third row.

If you were not using the App Starter, you would probably just make a single footer for all four content pages and then use JavaScript to change what “Previous” and “Next” link to.
38) Apply Custom Footers to Pages
38.1) Now we need to go back to each of our four content pages and connect the footers we just made.
38.2) Select ‘Position 1’ page and in ‘Page Properties’ set the ‘Footer’ to ‘footer_1’.

38.3) For ‘Position 2’ use ‘footer_2’.
38.4) For ‘Position 3’ use ‘footer_3’.
38.5) For ‘Position 4’ use ‘footer_4’.
Lesson 9: Test, Debug, Build
39) Simulate Device
39.1) Now click on the ‘Emulate’ tab tab at the very top of the screen.

39.2) In the left ‘DEVICES’ pane, select ‘Lenovo K900’.

39.3) In the center of the screen you should see the simulation of your application running inside a skin for a Lenovo K900 phone.
39.4) Go ahead and click on ‘Home’, ‘About’, ‘Series’ and ‘Resources’ navigation buttons in the footer. You will notice your pages are now hooked up.

39.5) Next, click on ‘Series’ then ‘Position 1’ and you will be able to move forward and backwards through your list of content.

Pretty neat, right? Feel free to play around with your app.
40) Test on Device
40.1) Now that our app is developed and it simulates the navigation we want in the ‘EMULATE’ tab, we can test our application on an actual device.
40.2) First we want to go to the ‘TEST’ tab at the very top of the screen.

40.3) You may get the following dialog box:

40.4) Go ahead and select the grey ‘DISMISS’ button for now.
40.5) Follow the ‘App Preview Device Testing Guide’ in the left-hand pane. Copied below for your convenience:
a) Install Intel App Preview on your testing devices(s). Search “Intel App Preview” to get it in the Apple* App Store, Google* Play Store, or Windows* Phone Store.
b) Push your local files to the Testing Server to run your latest development files.

41) Debug on Device
41.1) If you want to debug, make sure you’ve pushed HTML files that include the Weinre script tag below.
41.2) For on device debuggin to work properly, you must:
- Have your app running in App Preview, before clicking the debug button in the ‘TEST’ tab.
- Embed the tag below into your HTML files.
EMBED THIS WEINRE TAG IN YOUR HTML FILES”
<script src="http://debug-software.intel.com/target/target-script-min.js#6WuUE875lqFAExFAVLMC1yWZ7Rtk_Rg0TCW9wwiLvvc"></script>
42) App Preview Setup
42.1) Log into Intel App Preview on your device using your Intel XDK account credentials.
42.2) Either use the QR code reader (native or form within App Preview) to launch your app using the code to the right or Click the Server Apps tab located in the bottom nav bar of App Preview and navigate to your desired app product.
42.3) Click the Launch This App button and begin testing your app on device.
Scan the QR code provided in the ‘TEST’ tab to launch your app in App Preview.

43) Build for iOS
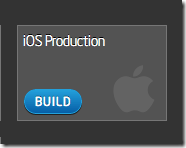
43.1) Click on the ‘BUILD’ tab at the top of the screen.

43.2) Here you can see all the stores you can build for. Click on iOS Production to build for Apple* iOS.
43.3) When the prompt below appears, select ‘USE EXISTING’ to prevent uploading your app again to the server without changes being made.

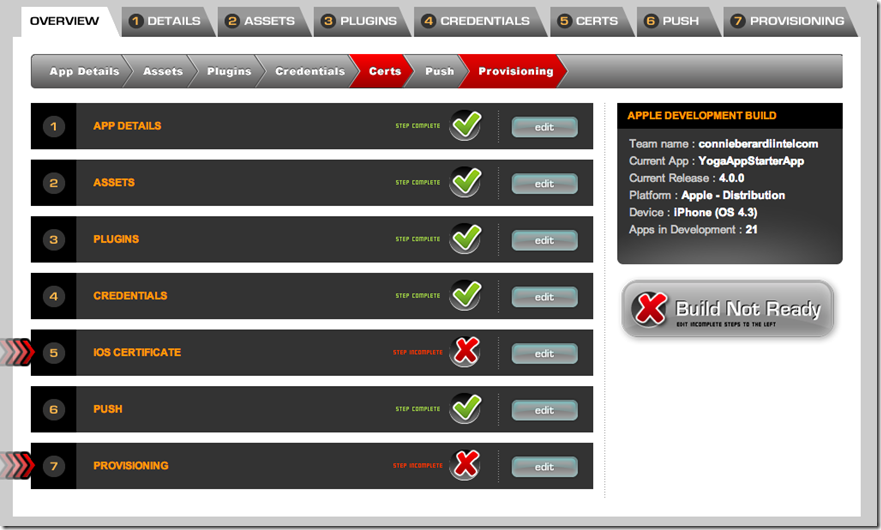
43.4) From the overview pane, you can easily see that your app will not build for iOS. You have to go through Apple* provisioning process and pay for certification to be an iOS developer before you can build or publish your app to the Apple* store. Links for walkthroughs are provided below. But for now we are going to move on and build for an Android* phone.
43.5) Click on the ‘CLOSE BUILD’ button in the top left corner and then click on the blue ‘BUILD’ button for Android.
44) Build for Android

44.1) In this Overview you will see your app already build for Android without having to do anything. If a red X appears you can click on that topic for a guided walkthrough of how to fix your application.

44.2) Click on the big green ‘Build App Now’ button on the right and hopefully you will see the screen below:

44.3) This means our application build for Android and we have the option of downloading an .apk file to submit to a store or load on our phone or emailing it to ourselves. We recommend you enter an email address and open the email on an Android phone to install the .apk. You might need to enable apps from third-party sources in your phone settings.
Good luck and congratulations!
You just developed a mobile application, ran it in a simulator, tested it on your device.
---
No comments:
Post a Comment