-

- -

Thursday, November 3, 2022

Getting Started With ADABAS and NATURAL Programming using Natural ONE IDE

.

This part describes the steps to access Adabas database using Natural language that is coded using Natural ONE IDE.

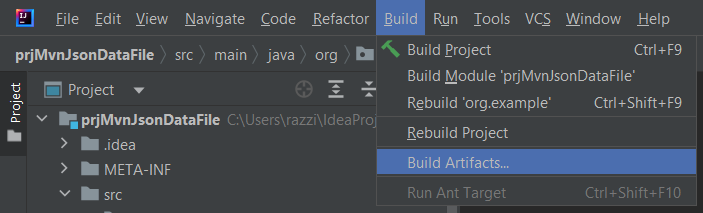
Continue with the project created in the previous part i.e. PRJ1. Create a new program, PRG2.

A Natural program requires a Data Definition Module in order to access Adabas database.

For Natural to be able to access a database file, a logical definition of the physical database file is required. Such a logical file definition is called a data definition module (DDM). (https://documentation.softwareag.com/natural/nat838unx/pg/pg_dbms_ada.htm)

To prepare DDM, some information regarding database and file name reference is needed. From Part 1, it is learned that the database no. is 12 and related file no. is 9.

Right-click SRC, select New/DDM.

Type the DDM/File name DDM1. Click “Next”.

Type 12 for “DBID” and 9 for “FNR”. Click “Finish”.

The result is a DDM file containing the short field names.

Alternatively, DDM files can be imported. For example, a DDM file Employees.NSD in the Natural ONE IDE sample can be used for this project. Download Employees.NSD into the local host machine.

Right-click SRC, select Import…

In the Import dialog window, select “File System”. Click Next.

Select the source folder and file. Click “Finish”.

The result is a DDM file containing a more friendlier field names.

Begin coding the PRG2 with the following codes.

/** New Program PRG2.
/**
DEFINE DATA
LOCAL
END-DEFINE
*
END

Put the cursor in the line below the word “LOCAL”, right-click and select “Advanced Edit Features/Import Data Fields…”.

In the “Import Data Fields” window, select “Data Definition Module” for the “Object Type”, and then click “Browse” to select “EMPLOYEES.NSD” file.

Select the following items and then click “OK”.
EMPLOYEES
.. FULL-NAME
.. .. NAME
.. DEPT
.. LEAVE-DATA
.. .. LEAVE-DUE
.. .. LEAVE-TAKEN

The items are now inserted into PRG2. To avoid confusion, add a text “-view” to the EMPLOYEES view as shown below.

Add codes to read and display the data after the “END-DEFINE” line.

READ EMPLOYEES-VIEW BY NAME
*
DISPLAY NAME 3X DEPT 3X LEAVE-DUE
*
END-READ

The READ statement is used to read records from a database. The records can be retrieved in physical sequence, in Adabas ISN sequence, or in the value sequence of a descriptor (key) field. The READ statement causes a processing loop to be initiated. (https://documentation.softwareag.com/natural/nat914win/sm/read.htm)
The DISPLAY statement is used to specify the fields to be output on a report in column format. A column is created for each field and a field header is placed over the column.
(https://documentation.softwareag.com/natural/nat914win/sm/display.htm)

The full codes is as follows.

/** New Program PRG2.
/**
DEFINE DATA
LOCAL
/*( imported data fields from Data Definition Module EMPLOYEES
1 EMPLOYEES-VIEW VIEW OF EMPLOYEES
2 FULL-NAME
3 NAME (A20)
2 DEPT (A6)
2 LEAVE-DATA
3 LEAVE-DUE (N2.0)
3 LEAVE-TAKEN (N2.0)
/*) imported data fields from Data Definition Module EMPLOYEES
END-DEFINE
*
READ EMPLOYEES-VIEW BY NAME
*
DISPLAY NAME 3X DEPT 3X LEAVE-DUE
*
END-READ
*
END

Press [ALT+SHIFT+X][N] to run PRG2.

To make PRG2 interactive, add below codes to get the employee names from the computer user.

/** New Program PRG2.
/**
DEFINE DATA
LOCAL
1 #NAME-START (A20) INIT <"ADKINSON">
1 #NAME-END (A20) INIT <"BENNETT">

1 EMPLOYEES-VIEW VIEW OF EMPLOYEES
2 FULL-NAME
3 NAME (A20)
2 DEPT (A6)
2 LEAVE-DATA
3 LEAVE-DUE (N2)
END-DEFINE
*
INPUT (AD=MT)
"Start:" #NAME-START /
"End: " #NAME-END

*
READ EMPLOYEES-VIEW BY NAME
STARTING FROM #NAME-START
ENDING AT #NAME-END
*
DISPLAY NAME 3X DEPT 3X LEAVE-DUE
*
END-READ
*
END

Press [ALT+T] to update the PRG2 to the Natural server.

Press [SHIFT+ALT+X][N] to run PRG2.

Suppose the computer user enters “ADKINSON” for “Start:” and “AHL” for “End:”, PRG2 will display the following.

For an enhanced input layout, a map can be used.

To be continued in the next part.

— — — — —

This post is a part of the series “Getting Started With Adabas & Natural”:
Part 1: Setting up Adabas & Natural Community Edition Docker Version.
Part 2: Accessing Adabas Database via Adabas REST Web app.
Part 3: Adabas “Periodic Groups” and “Multiple Values” representation in JSON data format.
Part 4: Accessing Adabas Database using Adabas TCP-IP Node Package.
Part 5: Creating Natural Project using Natural ONE IDE.
Part 6: Accessing Adabas Database using Natural Programming and Natural ONE IDE.

— — — — —

.

Thursday, October 20, 2022

[Java] Using Intellij To Work With JSON and Text File

 .

INTELLIJ PROJECT - Working with JSON and Text File

https://www.jetbrains.com/help/idea/developing-node-js-applications.html#ws_node_quick_start


Create A New Project

Click New Project

Name = prjMvnJsonDataFile

Archetype = org.apache.maven.archetypes:maven-archetype-quickstart

Click Create.

Note:

Maven Quickstart Archetype

maven-archetype-quickstart is an archetype which generates a sample Maven project:

https://maven.apache.org/archetypes/maven-archetype-quickstart/

Project creation done.

Add Dependency

<dependency>

   <groupId>com.fasterxml.jackson.core</groupId>

   <artifactId>jackson-core</artifactId>

   <version>2.9.6</version>

</dependency>

<dependency>

   <groupId>com.fasterxml.jackson.core</groupId>

   <artifactId>jackson-annotations</artifactId>

   <version>2.9.6</version>

</dependency>

<dependency>

   <groupId>com.fasterxml.jackson.core</groupId>

   <artifactId>jackson-databind</artifactId>

   <version>2.9.6</version>

</dependency>

Edit Class

package org.example;

// Java Program to Illustrate Setting Up of Jackson by

// parsing Jackson library json files and

// generating the same

// Importing required classes

import java.io.*;

import com.fasterxml.jackson.core.JsonGenerationException;

import com.fasterxml.jackson.core.JsonParseException;

import com.fasterxml.jackson.databind.JsonMappingException;

import com.fasterxml.jackson.databind.ObjectMapper;

import java.io.*;

import java.io.FileInputStream;

import java.io.FileNotFoundException;

import java.io.IOException;

import java.io.InputStream;

// Main class

class App {

    // Main driver method

    public static void main(String[] args)

    {

        // Creating an employee object with it's attributes

        // set

        Employee employee = getEmployee();

        ObjectMapper mapper = new ObjectMapper();

        // Try block to check for exceptions

        try {

            // Serializes emp object to a file employee.json

            String filePath="c:/ZTIJ//employee.json";

            mapper.writeValue(

                    new File(

                            filePath),

                    employee);

            // Deserializes emp object in json string format

            String empJson

                    = mapper.writeValueAsString(employee);

            System.out.println(

                    "The employee object in json format:"

                            + empJson);

            System.out.println(

                    "Updating the dept of emp object");

            // Update deptName attribute of emp object

            employee.setDeptName("Devops");

            System.out.println(

                    "Deserializing updated emp json ");

            // Reading from updated json and deserializes it

            // to emp object

            Employee updatedEmp = mapper.readValue(

                    mapper.writeValueAsString(employee),

                    Employee.class);

            // Print and display the updated employee object

            System.out.println("Updated emp object is "

                    + updatedEmp.toString());

        }

        // Catch block to handle exceptions

        // Catch block 1

        // Handling JsonGenerationException

        catch (JsonGenerationException e) {

            // Display the exception along with line number

            // using printStackTrace() method

            e.printStackTrace();

        }

        // Catch block 2

        // Handling JsonmappingException

        catch (JsonMappingException e) {

            // Display the exception along with line number

            // using printStackTrace() method

            e.printStackTrace();

        }

        // Catch block 3

        // handling generic I/O exceptions

        catch (IOException e) {

            // Display the exception along with line number

            // using printStackTrace() method

            e.printStackTrace();

        }

    }

    // Method 2

    // To get the employees

    private static Employee getEmployee()

    {

        // Creating an object of Employee class

        Employee emp = new Employee();

        emp.setId("E010890");

        emp.setName("James");

        emp.setDeptName("DBMS");

        emp.setRating(5);

        emp.setSalary(1000000.00);

        // Returning the employee

        return emp;

    }

}

// Class 2

// Helper class

class Employee {

    // Member variables of this class

    private String id;

    private String name;

    private String deptName;

    private double salary;

    private int rating;

    // Member methods of this class

    public String getId() { return id; }

    public void setId(String id) { this.id = id; }

    public String getName() { return name; }

    public void setName(String name) { this.name = name; }

    public String getDeptName() { return deptName; }

    public void setDeptName(String deptName)

    {

        // This keyword refers to current instance

        this.deptName = deptName;

    }

    public double getSalary() { return salary; }

    public void setSalary(double salary)

    {

        this.salary = salary;

    }

    public int getRating() { return rating; }

    public void setRating(int rating)

    {

        this.rating = rating;

    }

    @Override public String toString()

    {

        return "Employee [id=" + id + ", name=" + name

                + ", deptName=" + deptName + ", salary="

                + salary + ", rating=" + rating + "]";

    }

}

source: https://www.geeksforgeeks.org/how-to-setup-jackson-in-java-application/

Create an artifact configuration for the JAR

Build the JAR artifact

.